


Getting started with REYAX BLE RYBG211_LITE
I made some projects using Bluetooth in home automation and robotics. But Bluetooth is quite old tech now, also it is not used vastly because of small range. But BLE changes the whole concept of Bluetooth to not use in home automation projects. BLE stands for Bluetooth low energy and keeping low energy in mind we thought that it would give small range connection compatibility. But REYAX RYBG_211_Lite has been changed the whole game of BLE with its small antenna with long range.
Let’s see how to use this module with different electronics, we will make an offline BLE messenger using this and then test the range practically. I am new to BLE, and I am very sure I am making this fog beginners.

This project is sponsored by JLCPCB.com, one of the best PCB manufacturers deals in PCB prototypes, PCBA, SMT assembly, stencil and 3D-printing. Sign-up to JLCPCB using this link and get $54 new user coupons for future orders.
REYAX RYBG211_Lite:
The RYBG211_Lite is a 2.4Ghz Bluetooth V5.1 Low Energy Module. By using the AT command which is developed by REYAX, your products could be fast and easily connected with the smartphones and all kinds of Bluetooth devices.
- Bluetooth V5.1 with Bluetooth Low Energy.
- SILABS 32-bit ARM® Cortex®-M33 core industry-standard chip.
- Can connect 8 Host-Client RYBG21x modules at the same time.
- Metal cover against EMI interference.
- Control easily by AT commands.
- Standard Generic Attribute Profile (GATT).
- Designed with PCB integrated antenna.
AT commands:

Because this module has an inbuilt microcontroller unit, we can use this directly with our PC/Mobile. Just a serial monitor is need to give commands and display messages. At commands for this module is given below and you can download the full AT instruction set from here.
Components required:
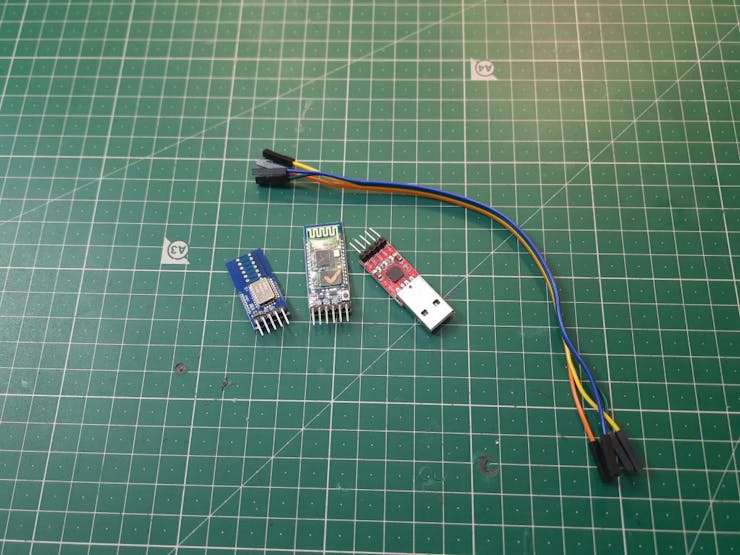
1) REYAX RYBG211_Lite
2) Usb to serial chip
3) Connecting wires
4) Android app and android ver-9.0
Connection diagram:

This comes with 4 wire interface, 2 for the power. This module can only work in a voltage range of 3.0 to 3.3volts. UART connection using TX and RX can be made with the computer system with an external Usb to serial programmer. Don’t forget to select the 3.3volt jumper on the serial programmer.
Setting up the module:
After making all the connections plug the USB in computer and open the Arduino IDE.

Select the COM port, can be seen in the device manager of your windows computer.
Then open the serial port in Arduino IDE, type AT and hit ENTER. It will display OK as the output if the USB/ Port is installed properly.
Module settings with At commands:

After making connection with PCB, we have to configure the module properly. We can change the baud rate, address, transmitting RF power. All the At commands are explained in the video, but here we are only discussing RF power mode.

This module is designed to work with very low power, but we can increase/decrease the range and then overall consuming power of this module using this AT+CRFOP command. In default it is matched to +10db but can go from -20db to +20db.
Messenger mode:
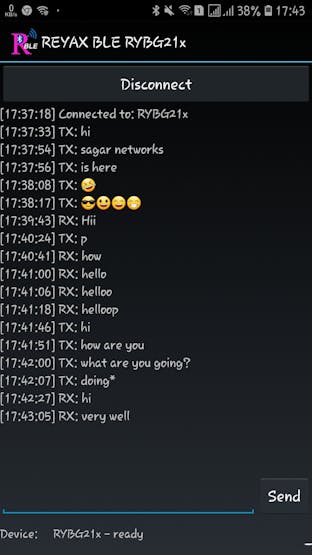
Either you need two BLE modules to make a setup or you can use a BLE android application provided by REYAX. Download and install the application in your mobile. Connect the module using Bluetooth inside app and send Hi. Now see the serial monitor of your computer it will display “BLE connected” and receive that message with channel info. Because you can pair a total of 8 device in parallel to make a chat room.
Now using the same info from the serial monitor. We can send the message using this syntax:
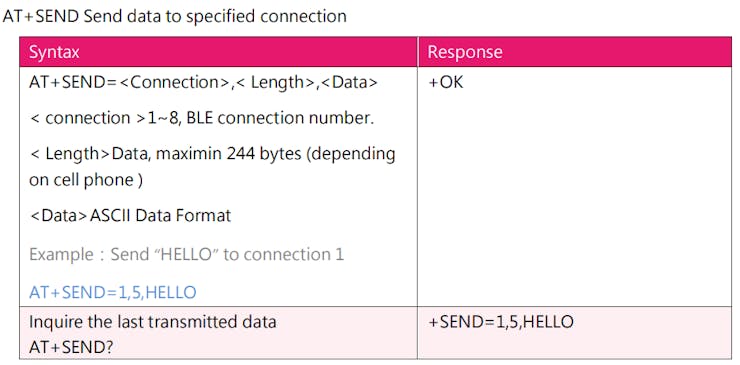
And the message goes to the mobile through BLE. Because it has a very good range about 200meteres (line of sight) and 80 meters (inside home).
So it can be used in home automation to get a good range without internet/Wi-Fi. You Can check our video on YOUTUBE, where we measured the range practically making a messenger setup.
How to order 1st time from JLCPCB using worth $54 coupons:
Collect all the files of your project and merge them as Gerber.
Go to JLCPCB using this link and register as a new user through google or Gmail account.

Go to Coupons section and check the eligible coupons.

Upload your Gerber file and select all the parameters.

Add to cart and go for checkout.

Fill all the details for delivery and select your delivery method.
Make the payment and get your PCB in just 7 days.
